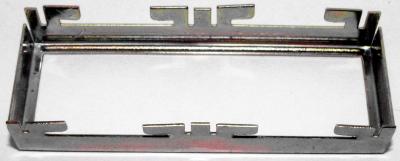
Now you’re sat with a pile of bits in front of you, I’ll show you how to put your OBC back together. You will want to clean everything as it goes back together. First prepare the bezel by straightening out all of the clips.
Now make sure the LCD is completely clean. Wipe it with a cloth soaked in a solvent like rubbing alcohol. Without the bezel in place it is easy to get it nice and clean. Blow off any dust from the zebra strips as well.
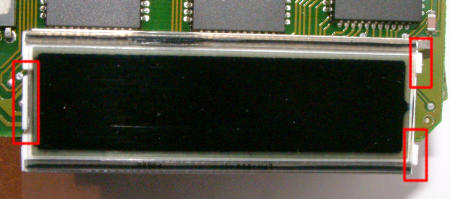
Next, hold the LCD display at an angle to the light and you should be able to make out the digits. This is so you put it back the right way round. Put the display, with zebra strips, onto the connector, and make sure it is positioned between the plastic clips either side.
Top view of the LCD, showing its position between the three clips
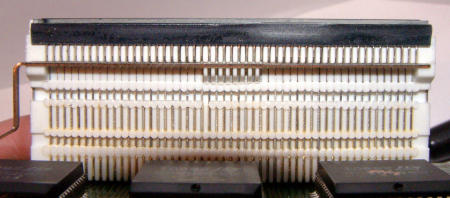
Side view of the LCD, showing the alignment of one of the zebra strips
Put the bezel back over the LCD and carefully push it down evenly until it contacts the screen all the way round. You should find that it only needs to be squeezed in about another .5mm to allow the tabs to be bent back to hold the bezel in place.
The rest of the reassembly is fairly simple:
- replace the two bulb surrounds either side of the display
- Clip the display board back to the front panel
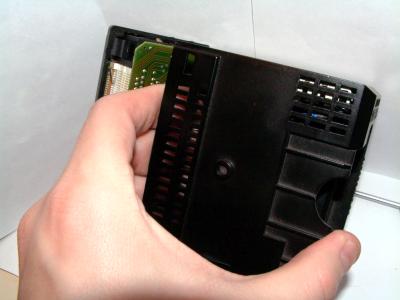
- Slide the main PCB back into the case of the obc until the rear connector is nearly clipped back into place.
- Hinge the front panel out of the way slightly to allow your fingers in to push the circuit board all the way home, until the connector clicks into place.
- Push the circuit board back into the case
- Clip the front panel back on
- Replace the two screws in the back panel. As with all screws going into plastic, you should replace the screw and carefully turn it anti-clockwise applying slight pressure until it clicks down into the thread it was originally occupying. Then tighten it clockwise.
- Clip the keyboard legend panel back on Replace it back in the car and you’re done.